How to Personalize a Cross Stitch Photo Pattern with a Frame, Name, and Embellishments
September 25, 2026
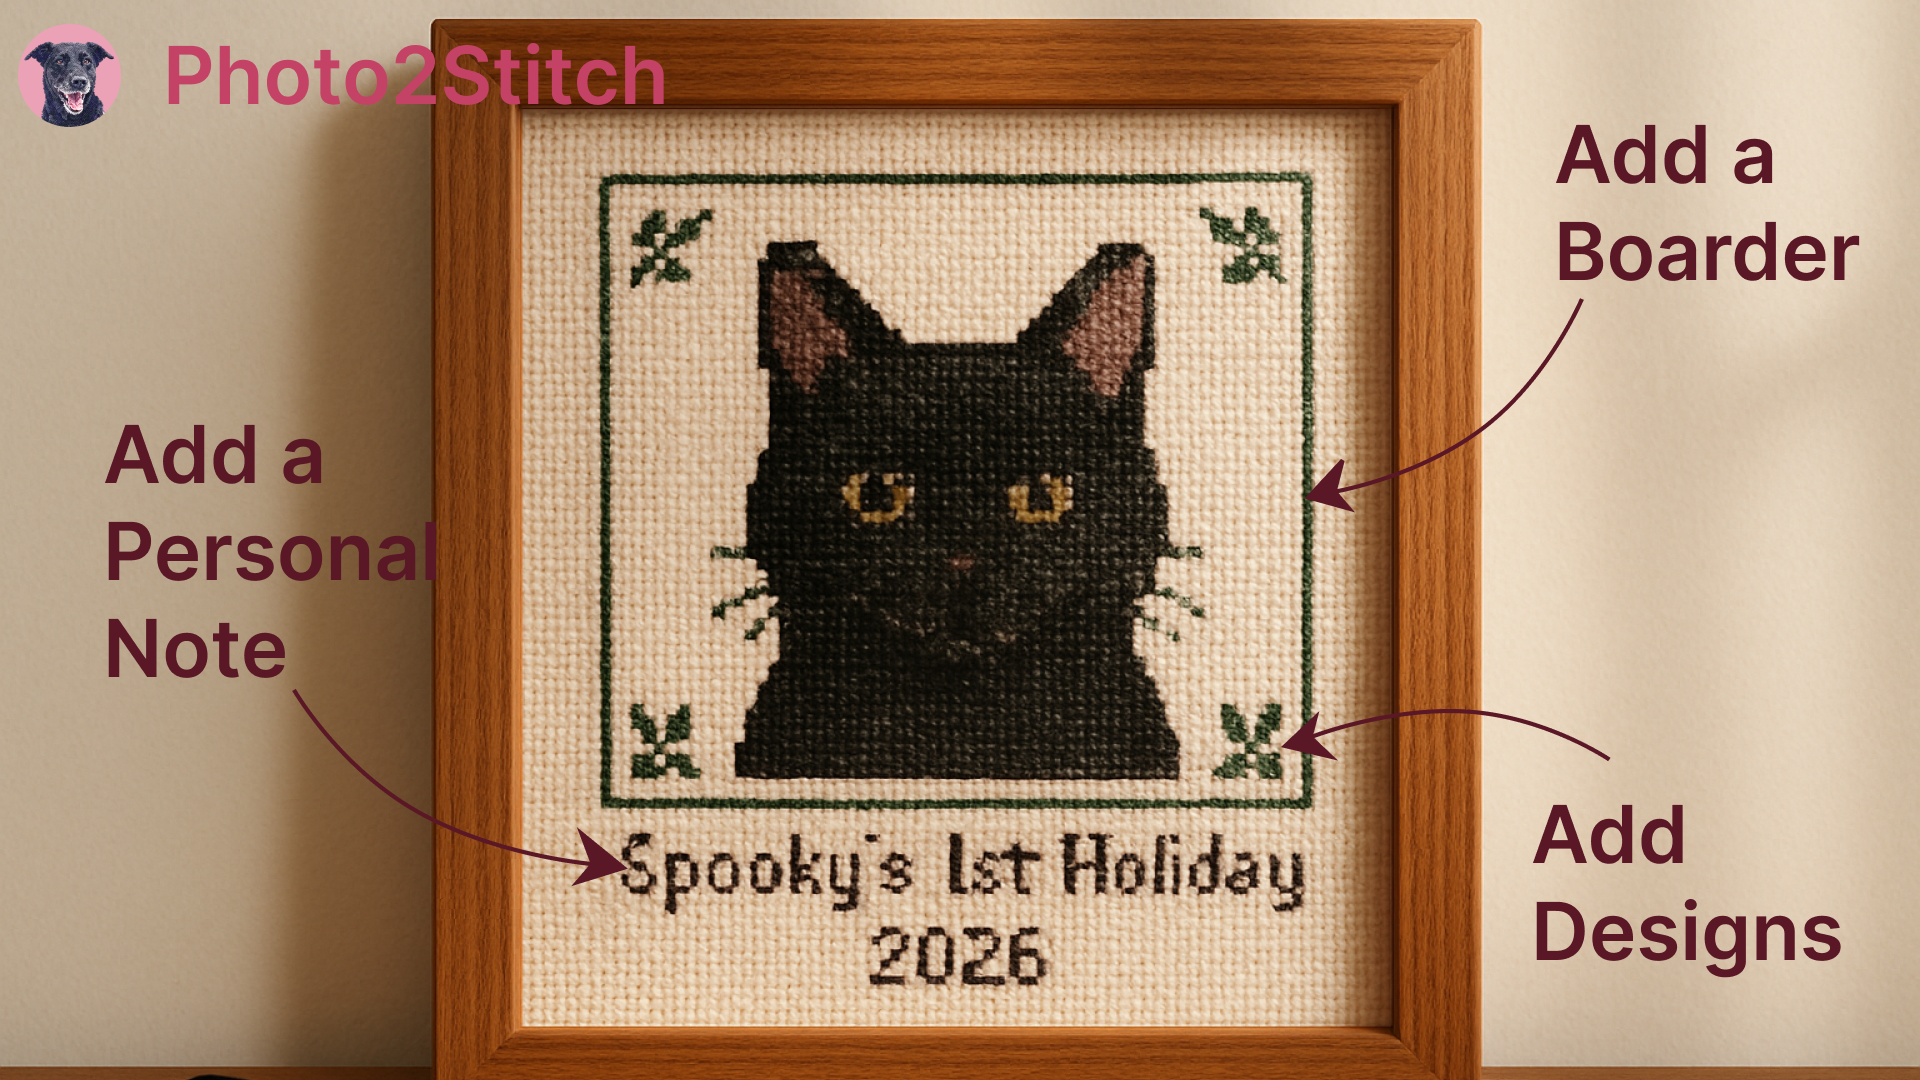
The stitch chart that comes out of a photo converter is technically complete but often feels anonymous. The subject is there (your dog, your grandmother's house, the photo from someone's first marathon finish line) but nothing in the chart itself ties the finished piece to a specific person or occasion. Adding that context directly in the pattern (a name, a date, a border) is what makes the difference between a cross stitch and a gift.
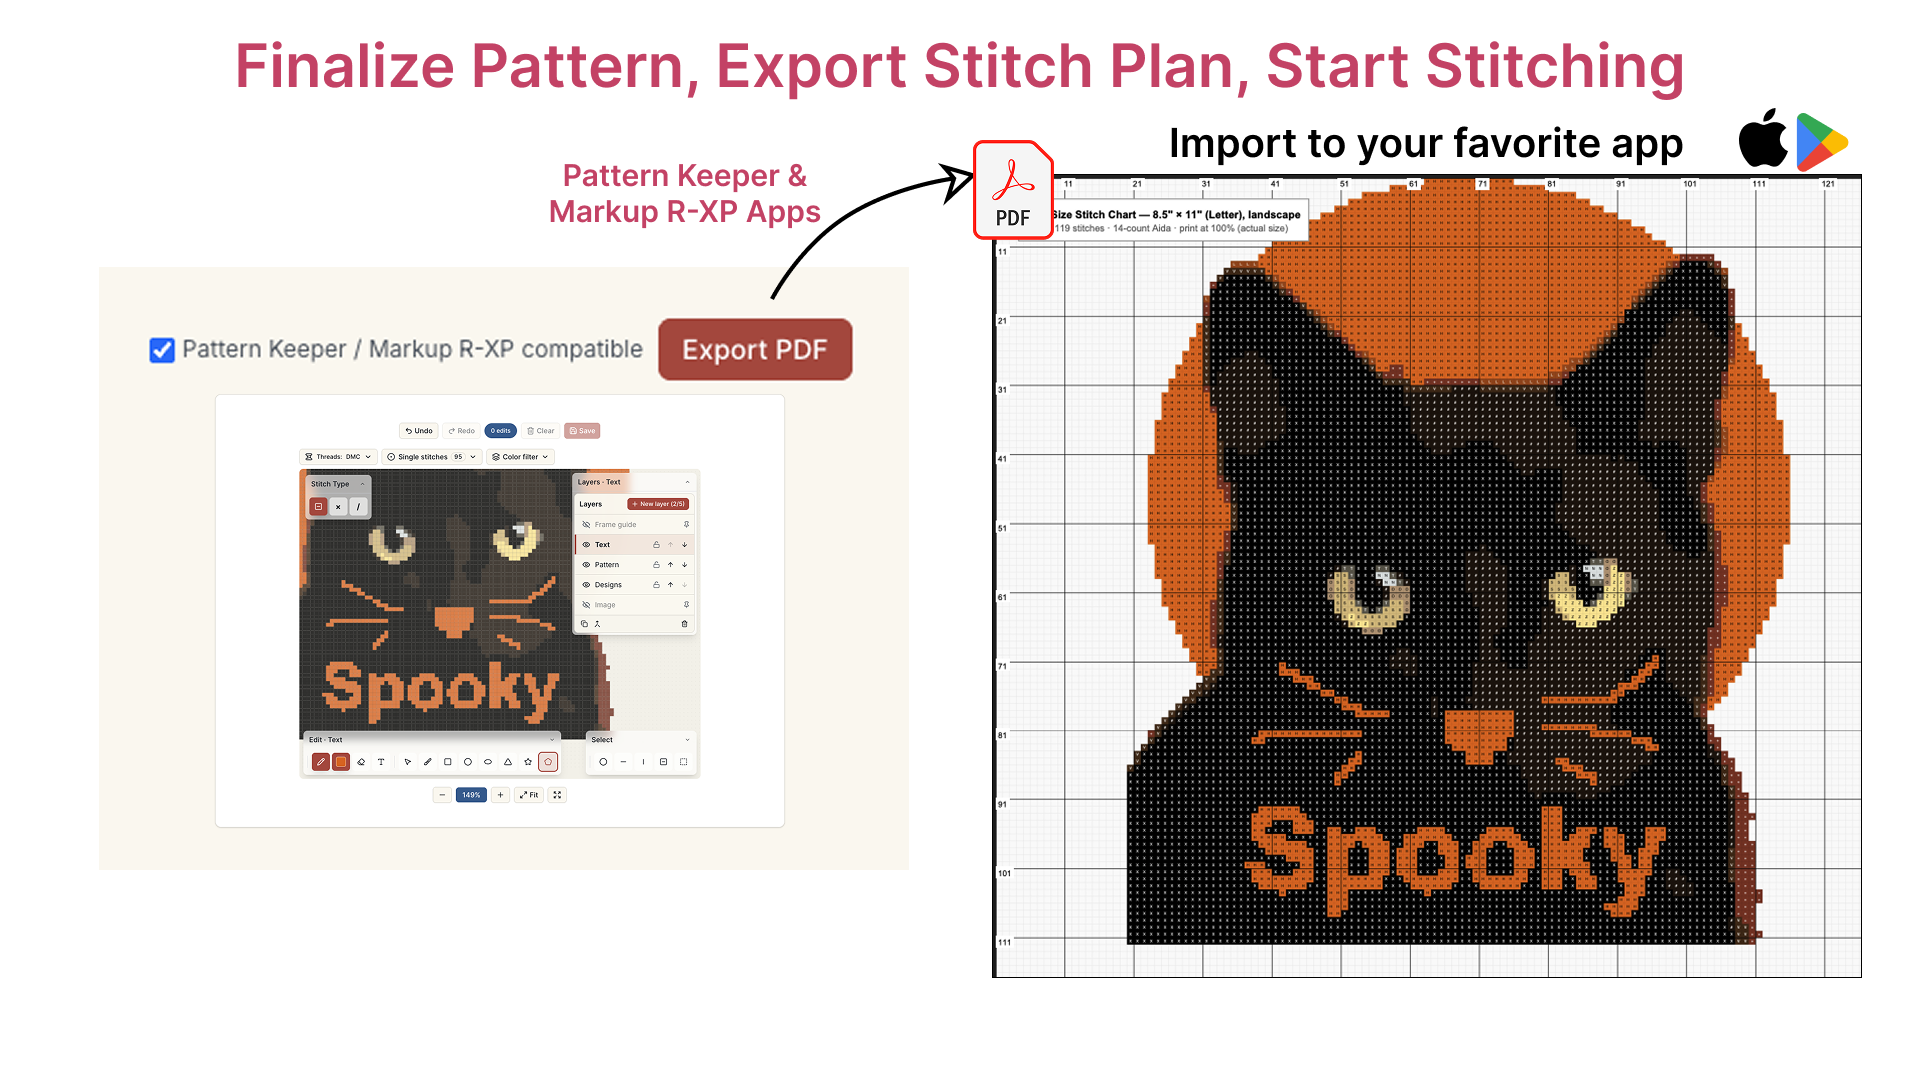
The Digital Canvas in Photo2Stitch includes tools for exactly this: polygon and freeform paint tools for drawing borders and decorative shapes, a text tool for adding names, dates, and short messages, and a layer system so every element stays independently editable. This post covers how to use them together to go from a raw photo pattern to a complete, personalized design ready to stitch and give.
Adding a border or frame
The most common embellishment is a rectangular or oval border around the main subject. It gives the piece a visual container, fills the fabric more completely, and (practically) makes framing easier because it defines the edges of the design.
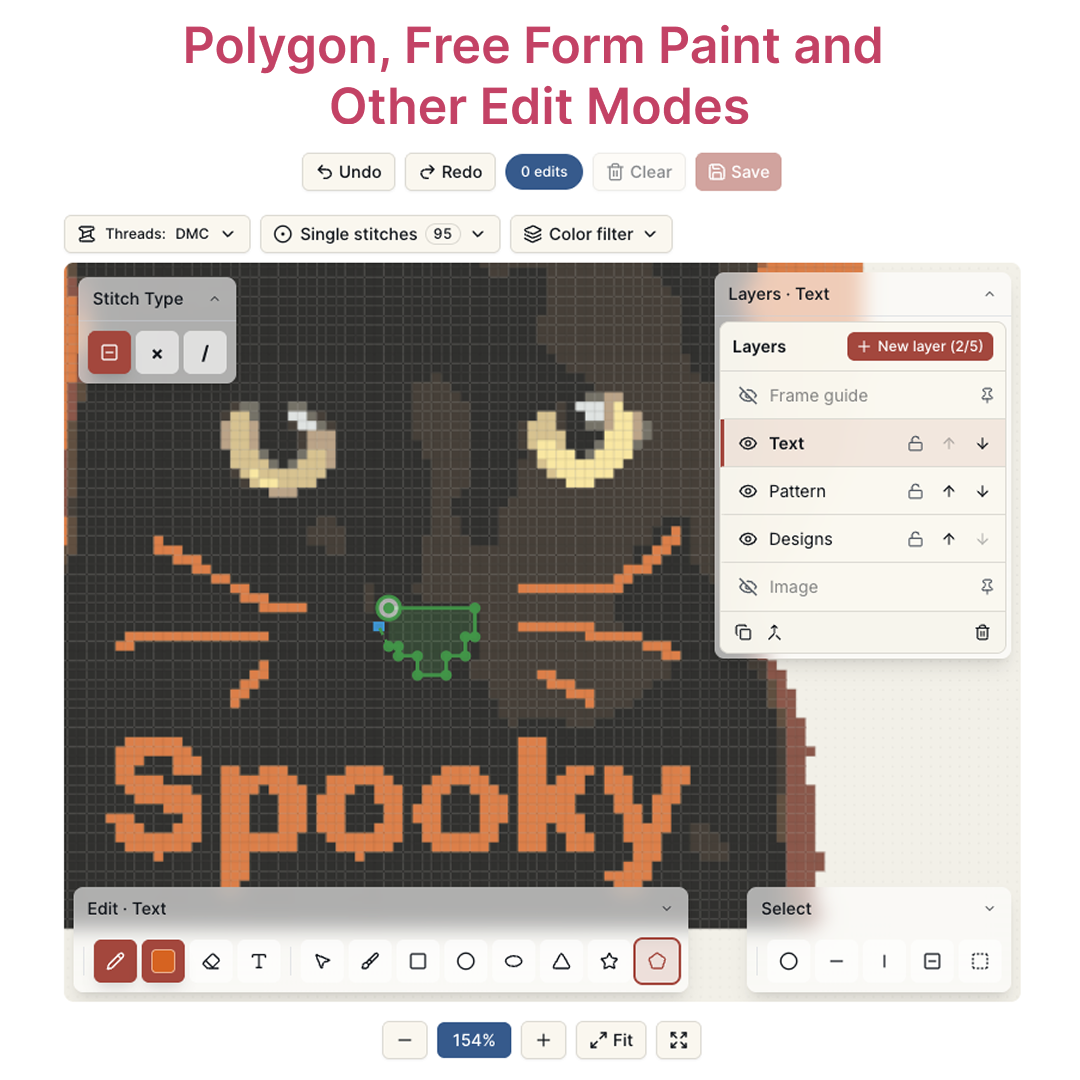
In the Digital Canvas, the polygon tool lets you draw a closed shape by clicking corner points. For a simple rectangular border, click the four corners at whatever distance from the subject you want, close the shape, and set the fill to empty (border only) with whatever color you've chosen. You can drag corners to adjust after the fact. The freeform paint tool works for softer, more organic outlines, useful if you're going for a rounded or irregular border rather than a strict geometric frame.
A few things to consider before you start: the border will add stitches to all four sides, so your finished fabric needs to be larger than the raw pattern alone. Adding a 10-stitch border on each side adds 20 stitches to both dimensions. Check the stitch count and canvas size in the overview panel after drawing to make sure it still fits your intended fabric.
Double borders (a thin inner line and a slightly heavier outer line with a gap between them) are a classic cross stitch frame treatment and straightforward to do with two polygon layers.
Adding names, dates, and text
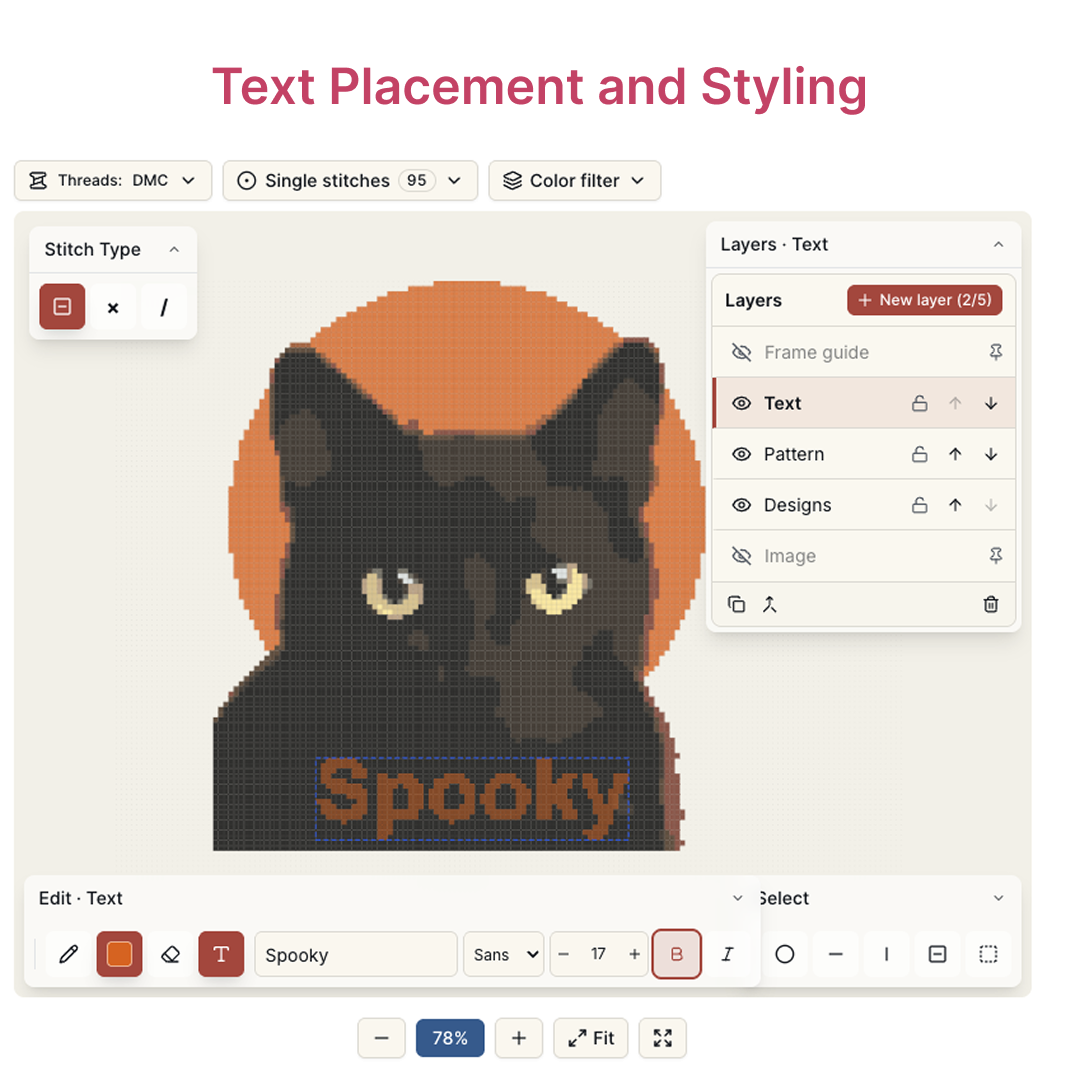
The text tool places individual letter characters onto the canvas using a cross stitch alphabet. You type your text, choose a color from your palette, and position it anywhere on the canvas. Each letter is rendered as actual stitches in the pattern, so it exports and stitches exactly like any other part of the chart.
For a gift, a name below the portrait and a year in the corner is the most common format, and also the most readable at small stitch sizes. One or two lines of text at a reasonable stitch height (typically 7–9 stitches per capital letter for legibility) adds minimal height to the overall piece. Going smaller than 5 stitches per letter tends to produce illegible results on fabric.
What you write is up to you. Some options that work well in practice: a name and year ("Emma 2026"), a short phrase ("made with love"), a date in full ("October 12, 2026"). Keep it short: cross stitch text at gift-appropriate sizes has a narrow character budget before it starts dominating the composition.
If you're making this as a fall or holiday gift, adding the year is worth it. A piece with a date embedded in the stitching carries a different weight than one without, especially years later.
Decorative shapes and freehand elements
Beyond a rectangular frame, the freeform polygon and paint tools let you add any shape: rounded corners, decorative motifs at the corners of a border, filled shapes as accents. Freeform paint works like a brush: you draw strokes directly on the canvas in whatever color you've selected, stitch by stitch.
Practically, the most useful applications here are corner decorations (a small filled diamond or cross motif at each corner of the border), dividing lines between the portrait and the text, and simple geometric fills to add color variation to a border. Freeform organic shapes are harder to stitch predictably, so keep freehand work to small accent elements rather than large filled areas.
Working in layers
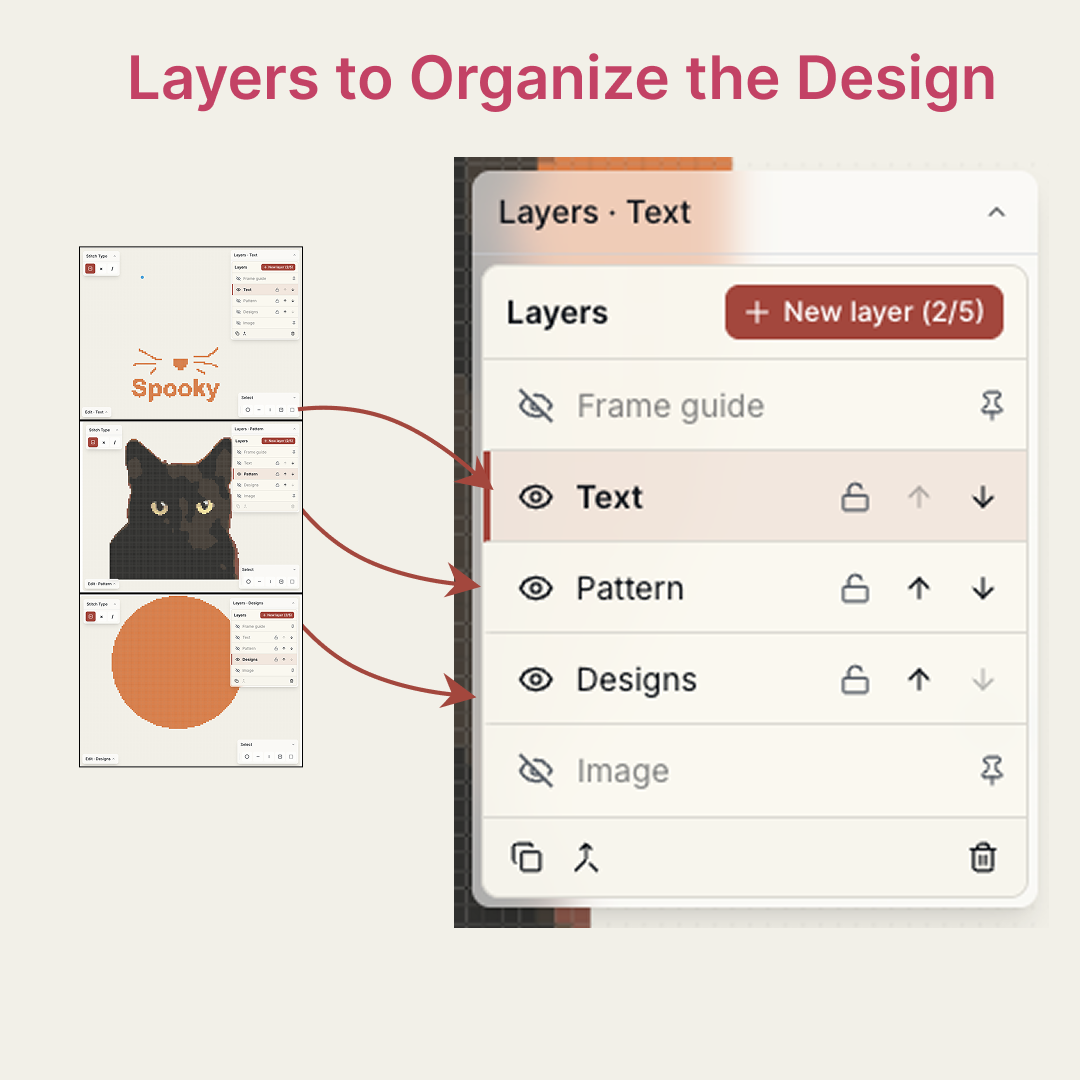
Every element you add (the portrait pattern, each border shape, each line of text) lives on its own layer. You can reorder them, hide and show them individually, and delete a layer without affecting anything else. This matters most when you're adjusting composition: if you decide the text needs to move down by 5 stitches, you move that layer without touching the portrait or the border.
The layers panel is also where you control the stacking order. If a border shape and the portrait overlap slightly, the layer higher in the stack sits in front. For most embellishment layouts this is straightforward, but it's worth checking when you have elements that meet or overlap at the edges.
What it looks like when it's all together
Before exporting, it's worth toggling layer visibility to do a final check: border edges aligning cleanly with the grid, text centered relative to the portrait, no unintentional overlaps. The pattern preview (the colored render without the grid lines) gives the clearest read of how the finished piece will look, since it's closer to how stitched fabric appears than the symbol chart is.
As a gift
A custom cross stitch from a photo is a reasonable candidate for almost any gift occasion where something handmade and personal fits. The personalization tools push it further: a piece with the recipient's pet's name, their wedding date, or a photo from a moment that's meaningful to them is specific to them in a way no purchased gift is.
The timing thing is real. A finished cross stitch takes time to stitch, and the planning time (choosing the photo, generating the pattern, adjusting it, ordering thread) adds to that. If you're stitching for a fall or winter occasion (a birthday in November, Thanksgiving, Christmas), starting the personalization step in September or October gives you comfortable margin. Pieces that need to be framed before giving need an extra week or two on top.
The embellishments don't need to be elaborate to work. A clean border and a name is often enough. The subject is already personal; the embellishments just make sure the piece announces that clearly when it's on someone's wall.
Upload a photo and start designing. The preview is free before you pay anything.
Try it with your own photo
Upload a photo and see your counted cross stitch pattern preview — free, before you pay anything.
Try the free pattern preview