How to Turn a Photo into a Cross Stitch Pattern (Step by Step)
August 11, 2026 · Updated November 2, 2026
Turning a photo into a counted cross stitch pattern used to mean graph paper, colored pencils, and a lot of squinting. Today a converter does the hard part, but the choices you make before and after conversion still decide whether the finished piece looks like your photo or like a pile of confetti. Whether you are converting an image to a cross stitch pattern for the first time or turning a picture into a cross stitch pattern for a gift, this guide walks through how to make a cross stitch pattern from a photo, with the decisions that matter most.
Step 1: Pick a photo that will actually stitch well
The single biggest factor in a good pattern is the photo you start from, not the software. What works:
- A clear subject that fills the frame. A face or a pet at half the image width survives conversion; a figure standing far from the camera becomes a smudge of mixed stitches.
- Strong contrast between subject and background. Cross stitch flattens subtle gradients, so a subject that already stands out will keep standing out at 50 stitches wide.
- Simple backgrounds, or none. A busy background spends your color budget on things nobody cares about. Very often, creators remove the background, to focus on the main subject. A PNG with a transparent background is ideal: every color goes to the subject, and you stitch fewer squares.
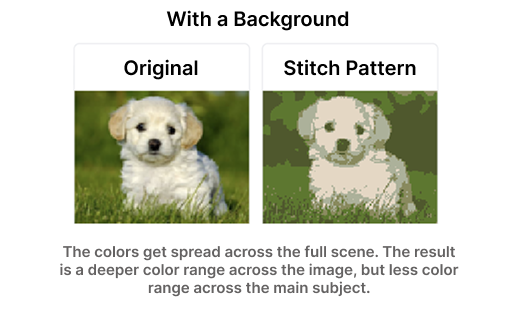
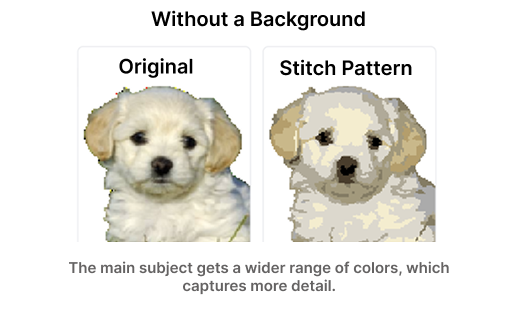
If your photo has a cluttered background, crop tighter before converting. It's the highest-leverage edit you can make.
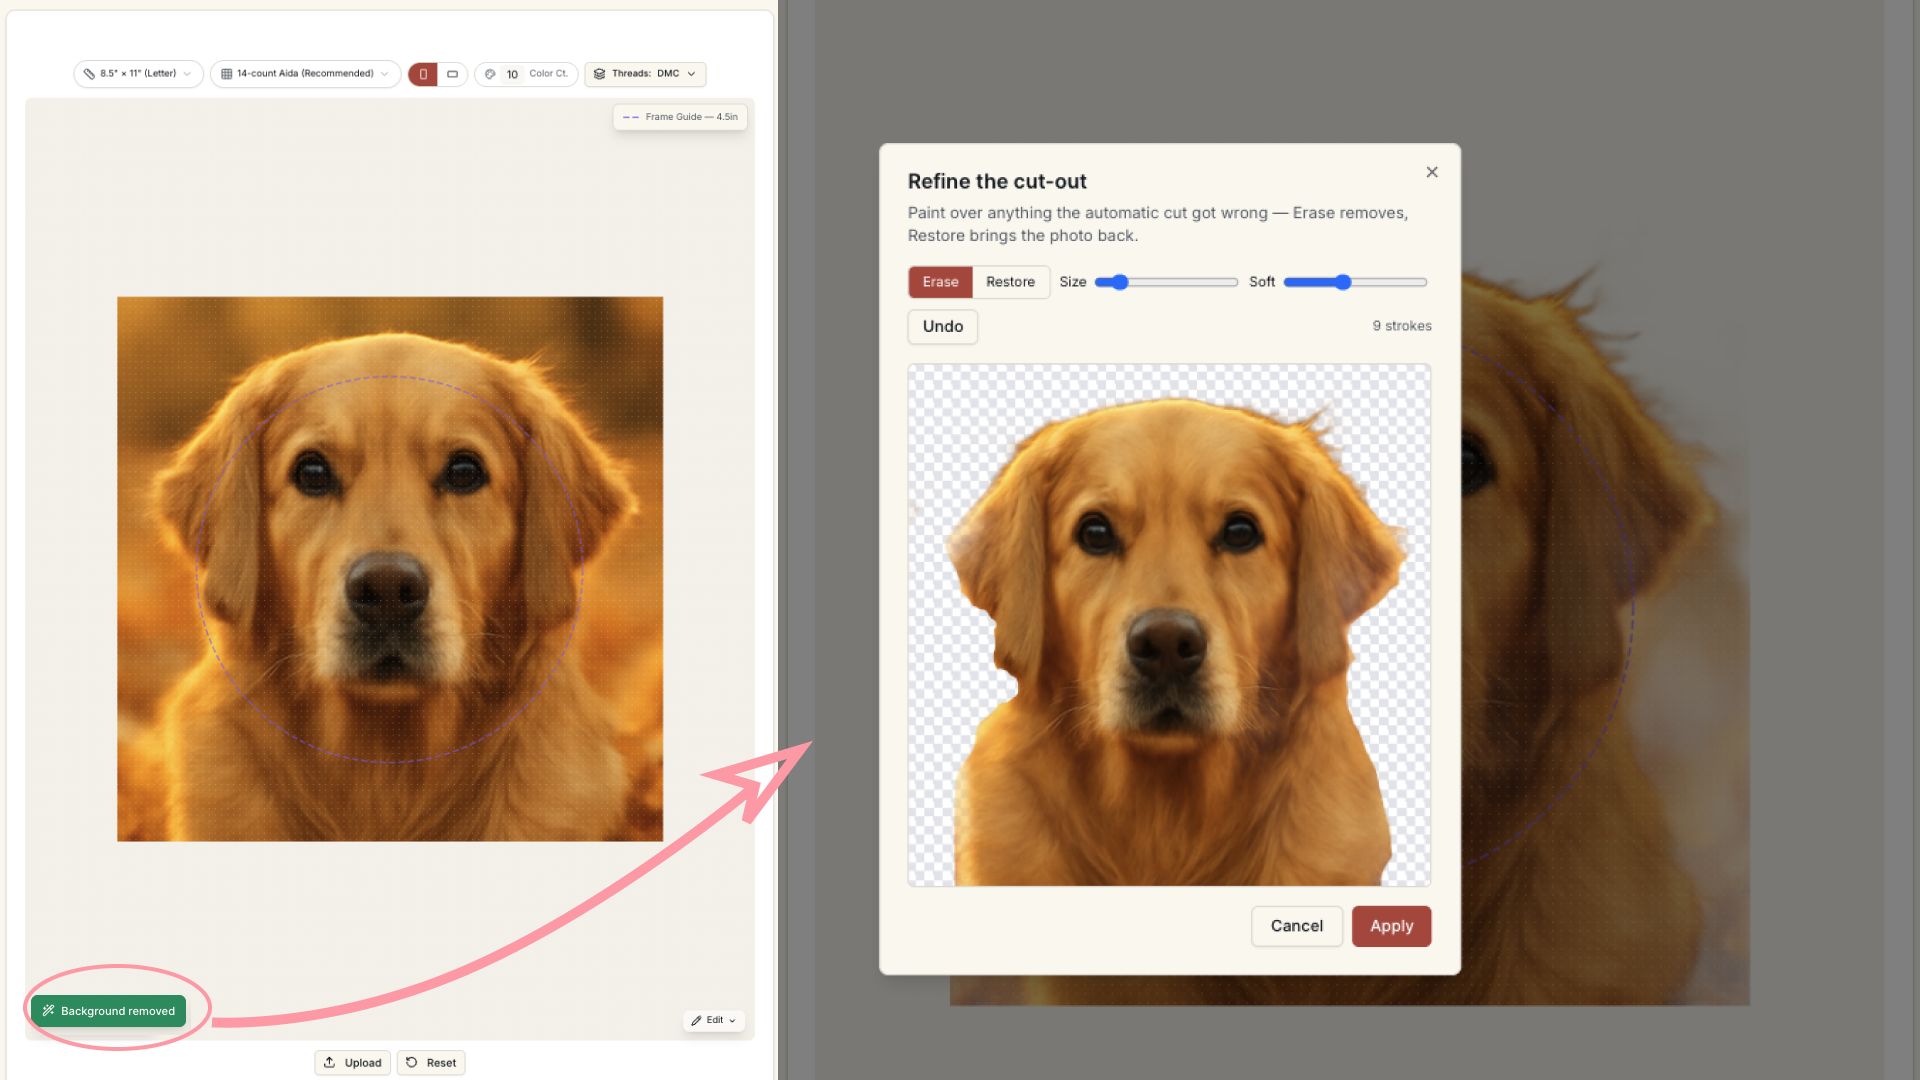
Photo2Stitch removes it for you in the editor, with a Refine brush for tricky edges like fur. Remove your photo's background free when you sign in. Every pattern you buy adds 2 more removals, and members get unlimited background removal.
Step 2: Upload and frame it
Upload your photo or picture into the pattern editor. Crop and rotate until the subject sits where you want it on the canvas, and adjust brightness and contrast if the photo is dull, the converter can only work with the tones you give it. A slightly over-contrasted photo usually converts better than a flat one.
Choose your canvas size and orientation here too. Bigger canvases mean more stitches and more detail, but also more hours of stitching, an 8.5×11" pattern at 14-count is roughly 130×170 stitches, which is a serious project. Keep in mind that you will probably use an embroidery hoop, or something similar to secure your canvas. You want at least 2 inches on each side of breathing room. Photo2Stitch an optional frame guide for a max size hoop for any given canvas.
Step 3: Choose a color count (fewer than you think)
The converter maps your photo to real DMC thread colors, anywhere from 2 to 50 of them. More colors is not automatically better:
- 10–15 colors suits high-contrast subjects, silhouettes, and stylized looks. Fast to stitch, bold result.
- 20–30 colors is the sweet spot for most portraits and pet photos — enough to model skin and fur without constant thread changes.
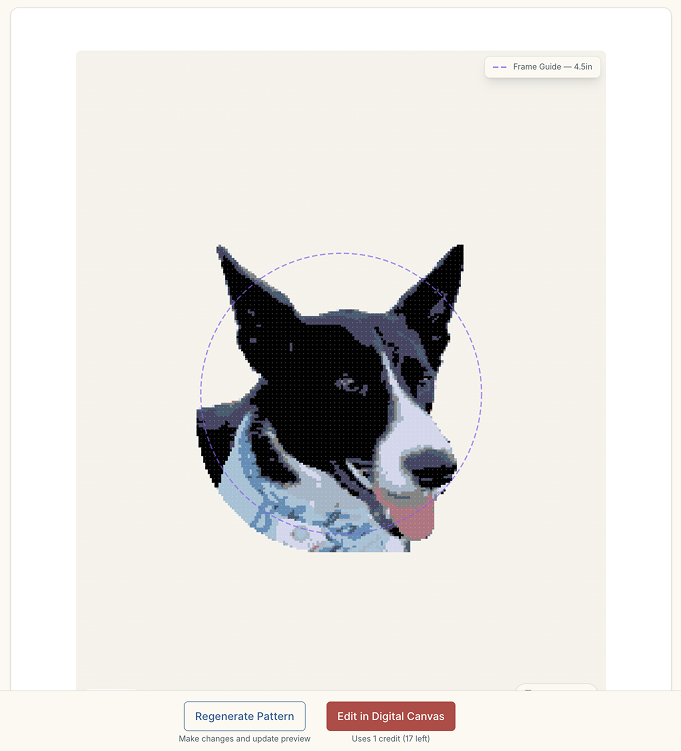
- 40+ colors only earns its keep on large canvases with photographic detail. On small canvases it produces confetti: isolated single stitches of near-identical colors that are miserable to stitch and invisible from two feet away.
Photo2Stitch's conversion runs a confetti-reduction pass that merges those stray single stitches into their neighbors, which is exactly the cleanup a hand-charted pattern would need.
Step 4: Turn the photo into a cross stitch pattern (free preview)
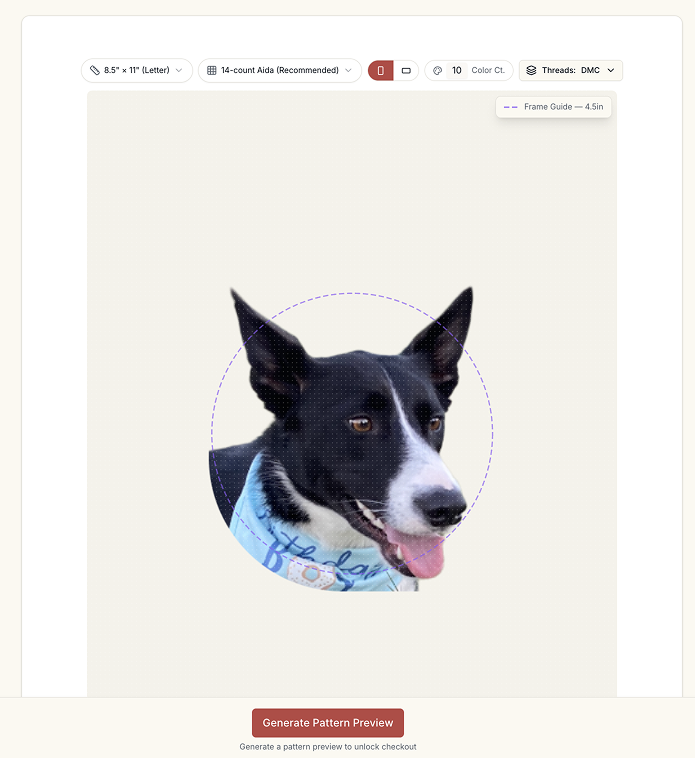
Generate the pattern preview, it's free, before any payment. This is the moment to be honest with yourself: does it read as your photo? If not, regenerate with different settings rather than pushing on. The usual fixes, in order: crop tighter, raise the contrast, then adjust the color count up or down. Two or three preview rounds is normal.
Step 5: Fine-tune on the digital canvas
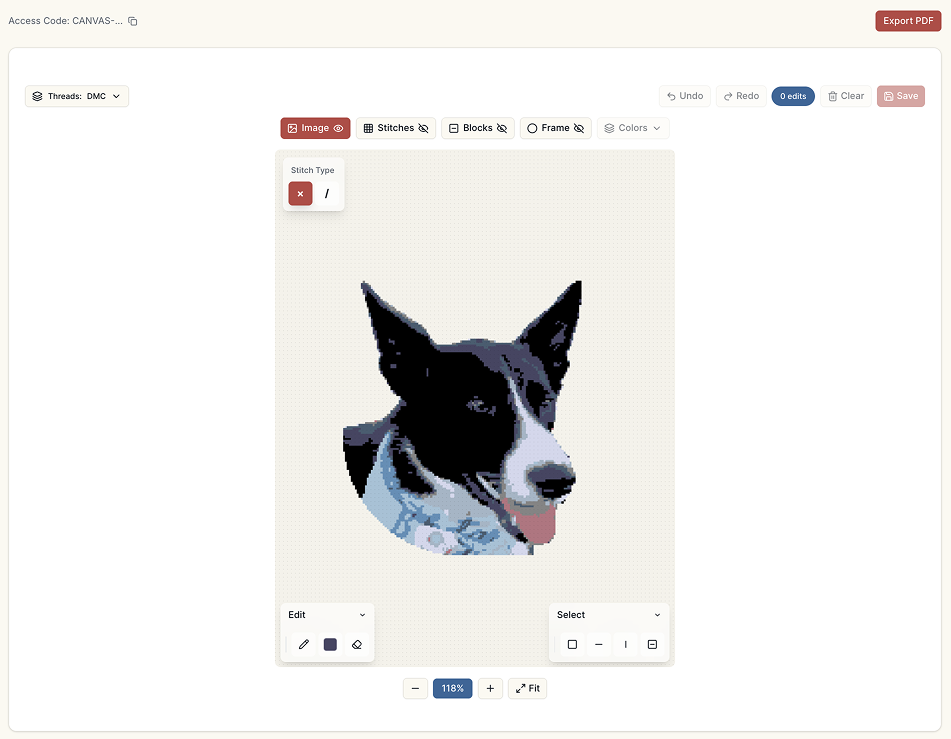
Once you unlock the pattern, the digital canvas lets you edit individual stitches, swap a thread color everywhere it appears, clean up an edge, remove a distracting patch, and shows a bill of materials with exactly how much of each DMC thread the piece needs. Export the chart and color key as a printable PDF when you're happy. You can also add backstitch outlines, French knots and lettering for fine detail a photo can't produce on its own. Algorithms are not magic, and cannot always get exactly what you want. That's why we created the digital canvas, so you can edit your canvas anytime, as many times as you want.
A realistic sense of the work
A 70×70-stitch pattern, on a 14-count Aida canvas, is roughly 5in x 5in creation, 4900 stitches, and 25 hours of pure focus, meditation and enjoyment. Photo2Stitch and digital canvas can help you jumpt into faster.
The best cross stitch pattern converters let you preview the result before you pay. Photo2Stitch's preview is free, so you can convert a picture to a cross stitch pattern, check whether it looks right, and regenerate as many times as you need before committing. If you have been searching for a free program for turning pictures into cross stitch patterns, that free preview is a good place to start.
Ready to see yours? Upload a photo and preview the pattern free.
Try it with your own photo
Upload a photo and see your counted cross stitch pattern preview — free, before you pay anything.
Try the free pattern preview