DIY Custom Cross Stitch Kit from a Photo: A Christmas Gift
November 5, 2026
We all have crafty friends. This cristmas, a perfect gift for your crafty friend is a DIY cross stitch kit with a custom image of somethign or someone dear to them. Awwwe, now that's a thoughtful gift. The custom photo can be of their dog in a Santa hat, a grandkid on the porch, or the house they grew up in. Photo2Stitch can help you build this DIY kit. The pattern and bills of materials comes from Photo2Stitch and you do the shopping. Here is the secret element for folks new to cross-stitching: print the pattern on a water-soluble stabilizer paper, then transfer it to the canvas.
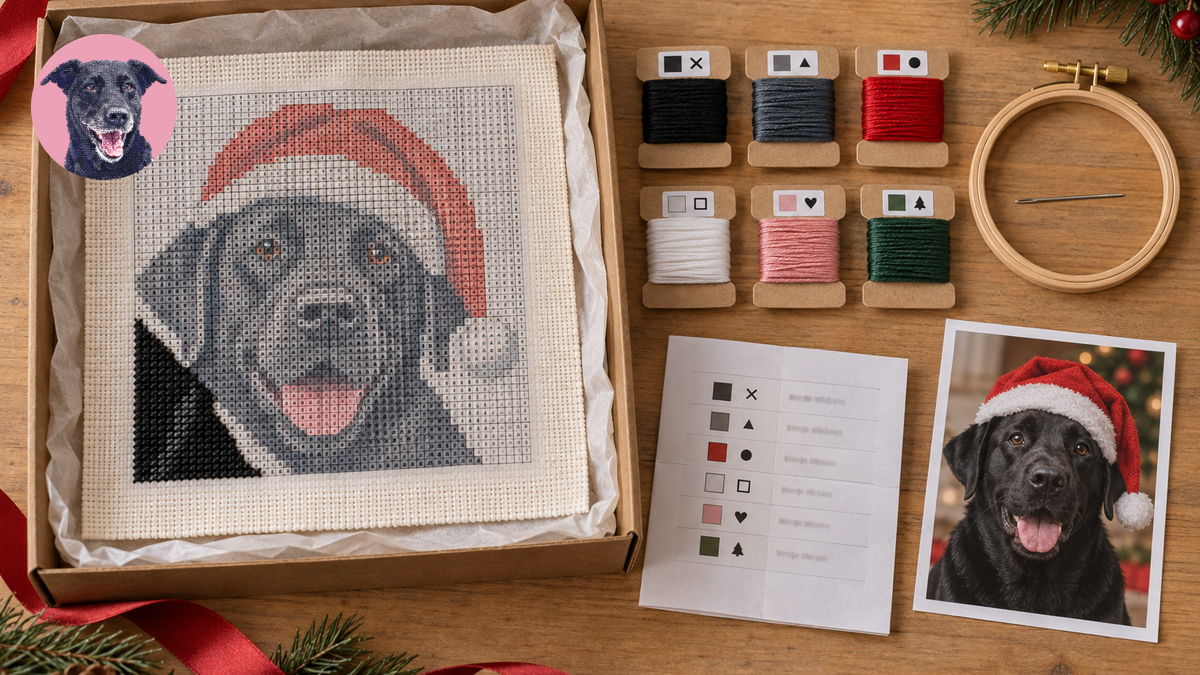
What goes in a DIY cross stitch kit
| In the box | Where it comes from |
|---|---|
| The chart, printed on water-soluble stabilizer | Page 1 of the DIY kit PDF from Photo2Stitch |
| The color key, printed on paper | The color key pages of the same PDF |
| Fabric, cut to size | A craft store; Aida in the same count as the pattern |
| Embroidery floss, one card per color | The color key, which lists every DMC or Anchor number and how many skeins you need; the kit PDF ends with a label for each card |
| A tapestry needle | Size 24 for 14-count, 26 for 16 or 18-count |
| An embroidery hoop | A little bigger than the stitched area |
| A short instruction card | The instructions page of the kit PDF, or the card text at the end of this post |
Printed stabilizer is what makes this feel like a store-bought stamped cross stitch kit. The chart sits right on the fabric, so whoever opens the box can start stitching the same evening without counting a single square.
Step 1: Pick the photo and a size that fits one sheet
Christmas photos make the best kits: a pet in a Santa hat, a family photo by the tree, the first snow in the yard. Pick one where the subject fills the frame and the light is good, because a face that's small in the photo only gets a few stitches.
Then pick the canvas size with the stabilizer in mind. Printable stabilizer usually comes in letter-size sheets (8.5 × 11 inches), and the chart prints at its real size, so in the editor choose 8.5" × 11" (Letter) or anything smaller. The DIY kit export only works for sizes that fit on one sheet. For a first-time stitcher I'd go smaller: a 5 × 7 is a few weekends of stitching, while an 8 × 10 is most of the winter. The Christmas gift guide has a table of sizes, stitch counts and hours.
Step 2: Make the pattern kit-friendly
A kit should be enjoyable to stitch, so keep the pattern simple. Around 15 to 20 colors is plenty for a gift kit; fewer colors means fewer skeins to buy and fewer symbols to tell apart. If the photo has a busy background, remove it in the editor, so the stitching goes to the subject and the rest of the fabric stays plain.
Once the pattern is unlocked, tidy it on the Digital Canvas:
- Clean up stray single stitches, which are the fiddliest part of any photo pattern. The confetti stitch guide shows how.
- Add a name and the year. Backstitch lettering is the usual style for a caption under a portrait, and full-stitch text works for a bold name across the top.
Step 3: Print the cross stitch pattern on water-soluble stabilizer
On the Digital Canvas, open the Export menu and choose DIY kit PDF. The file is laid out for exactly this gift. Page 1 is the Life-Size Stitch Chart, with the symbols and a heavier line every 10 stitches at the real size of the piece. The pages after it are for paper: print-and-stitch instructions, then the color key and floss card labels.
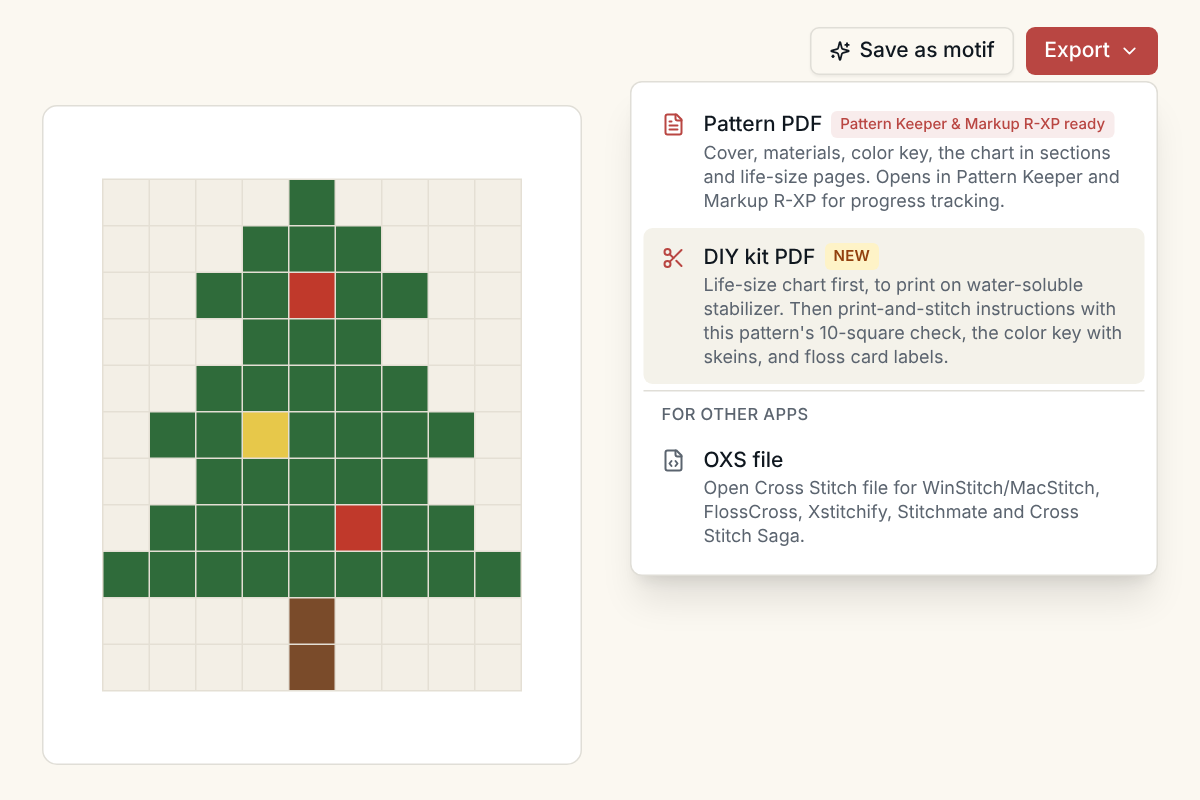
If DIY kit PDF is greyed out, the canvas is bigger than a letter sheet, and the menu says what size it is. Go back to Step 1 and pick a smaller one. Already exported the regular Pattern PDF? Its last page is the same Life-Size Stitch Chart, so you can print that page instead.
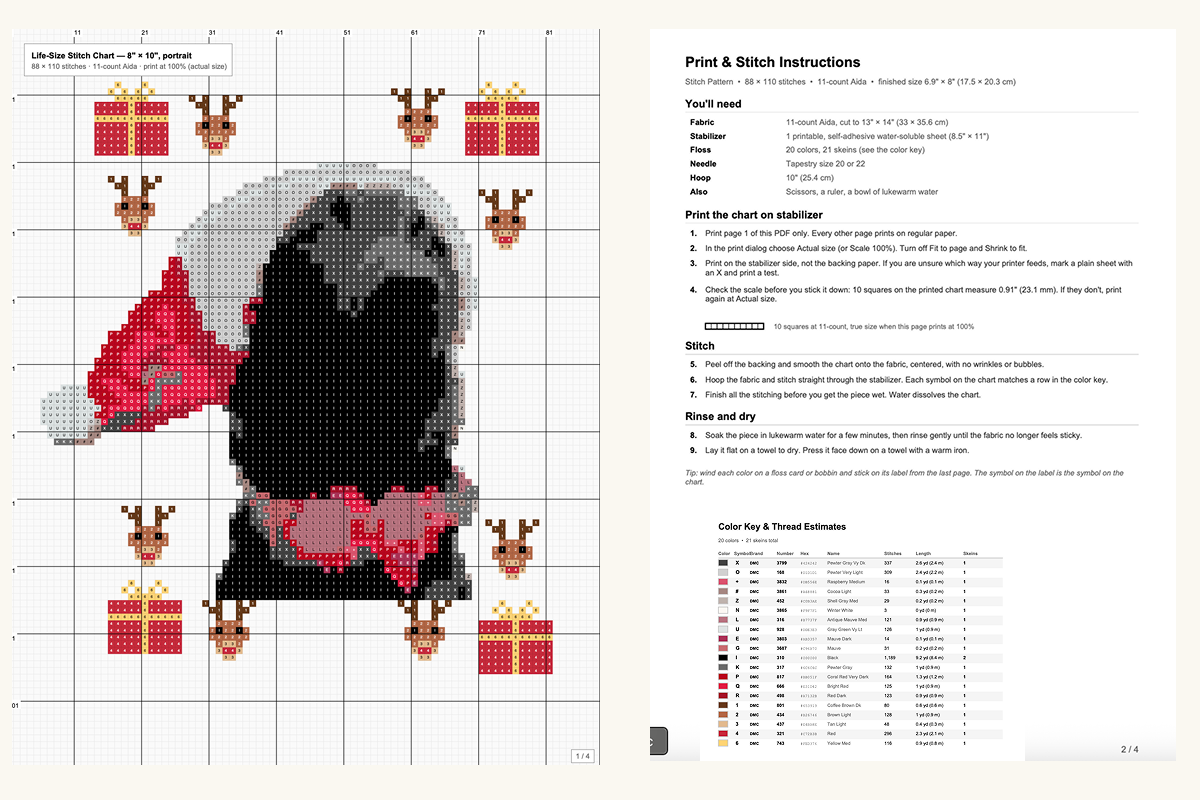
A water-soluble cross stitch pattern needs printable, self-adhesive stabilizer. Sulky's Sticky Fabri-Solvy is a common one and comes in letter-size sheets; check the packet for which printers it works with.
To print the cross stitch pattern at actual size:
- Print only page 1, with the scale set to Actual size or 100%. "Fit to page" shrinks the chart just enough that the squares stop lining up with the fabric.
- Print it once on plain paper first and measure. The instructions page gives the target for your pattern, for example 0.71 inch (18 mm) for ten squares on 14-count, and draws a strip of 10 squares at true size to hold against the print. If the chart comes out short, the printer is still scaling.
- Print onto the stabilizer and let the ink dry for a few minutes before you handle it.
Print the rest of the kit PDF on ordinary paper. The color key tells the stitcher which thread each symbol stands for, and the instructions page walks them through stitching on the stabilizer and rinsing it away.
Step 4: Buy the threads from the color key
The color key in the kit PDF lists every color by its DMC (or Anchor) number, with the thread length and number of skeins the pattern needs. Take it to the craft store or order online, and buy one extra skein of the two or three colors that cover the most area, since those are the ones that run out.
This is where a homemade kit can beat a shop one. Wind each color onto a floss card and stick on its label from the last page of the kit PDF. Each label puts the thread number next to its chart symbol, so the stitcher matches card to symbol and never has to check the key mid-row.
Step 5: Cut the fabric
Use Aida in the same count you chose in Photo2Stitch, so each printed square sits over one square of fabric. A 14-count chart goes on 14-count Aida; if the counts differ, the printed grid drifts away from the holes within a few inches.
Cut the fabric with at least 2 to 3 inches extra on every side of the design, for the hoop and for framing later. Tape or zigzag the edges so they don't fray in the box.
You can also stick the chart onto the fabric before you wrap it, smoothing it from the middle out and lining the grid up with the Aida squares. That saves the recipient the fiddliest step. Leave it loose instead if they like to do it themselves.
Step 6: Pack the kit
Put the fabric (with the chart on it, or the chart sheet in a clear sleeve), the floss cards, the needle, the hoop, the printed color key and the instructions page in a box. A photo of the original picture makes a nice extra, so they can see what they're stitching toward. Then the Christmas cross stitch kit is ready to wrap.
If they'd like to make more patterns from their own photos afterwards, a Photo2Stitch gift membership fits in the same box as a printed card.
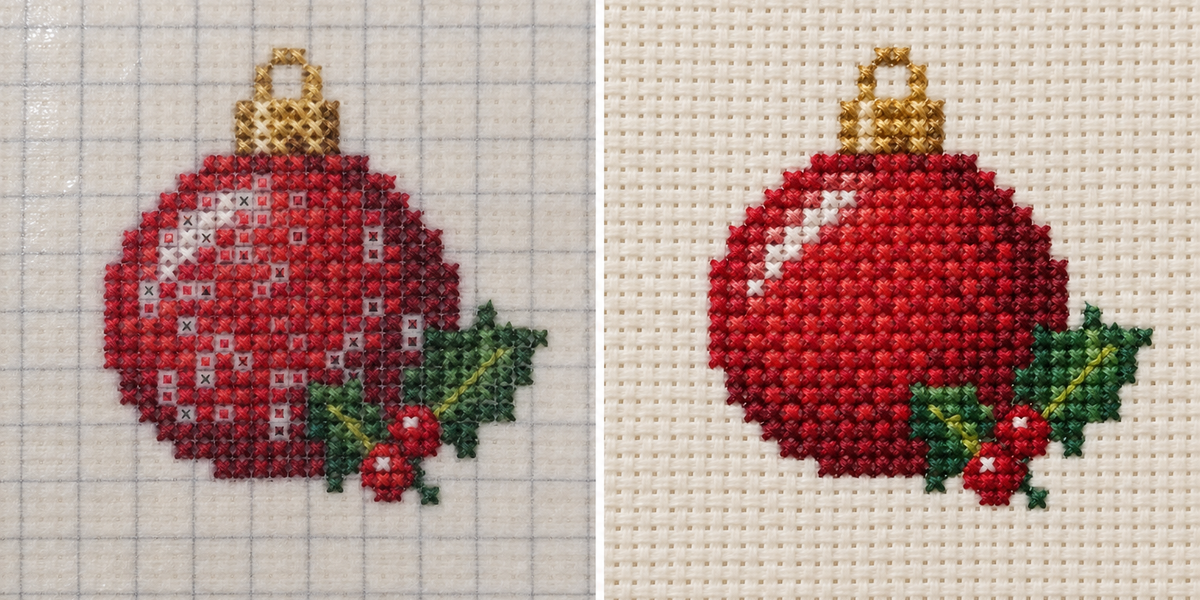
Instruction card to copy
The kit PDF already has a full instructions page. If you'd like a handwritten card in the box too, this is the short version.
- Peel the backing off the printed chart and smooth it onto the fabric from the middle out. (Already done? Skip to step 2.)
- Put the fabric in the hoop, chart side up, firm but not stretched.
- Stitch through the chart and the fabric together. Each symbol is one cross stitch; the color key says which thread it is.
- When you're finished, trim the extra chart around the edges and soak the piece in lukewarm water, following the stabilizer packet, until the chart dissolves. Rinse once more in clean water.
- Lay it flat on a towel to dry, then press it face down on a towel.
If something goes wrong
The grid drifts off the Aida squares. Canvases have some imperfections, and measurements sometimes are a bit off. Not to worry, there are a few easy solutions. If the pattern looks good, somethign I would suggest is just to do your best to follow it, even if it seems off a bit. If you want to be super accurate, then double check: chart was scaled when it printed, the plain-paper measurement from step 3, fix the print setting and print a new sheet.
The ink smudges. The sheet was handled before the ink dried, or the printer isn't one the stabilizer is made for. If it smudged but is stable, I would again suggest you follow it best you can. It will look good unless the image is warped.
White residue after drying. It didn't all rinse out. Another soak in clean water clears it.
DIY kit PDF is greyed out. The pattern is bigger than one letter sheet. Pick a smaller canvas size, or leave out the stabilizer and export the Pattern PDF, which splits the chart into sections that print on regular paper. That PDF also opens in Pattern Keeper and Markup R-XP, so the stitcher can follow it on a phone; the Pattern Keeper guide explains how.
Try it with your own photo
Upload a photo and see your counted cross stitch pattern preview — free, before you pay anything.
Try the free pattern preview