How to Turn a Photo into a Floss Pattern
September 1, 2026
A floss pattern from a photo is a counted colour chart whose palette is real stranded embroidery cotton — usually DMC or Anchor — rather than tapestry wool or yarn. Each square on the chart is a stitch you work with a stated number of strands. Most people stitch those squares as counted cross stitch on Aida; the same floss list can feed other counted work if you keep the grid.
This guide focuses on the thread side: brand codes, how many strands to pull, why photo palettes explode into near-duplicate numbers, and the three conversion steps.
What “floss” means on a photo chart
Six-strand embroidery floss is a divisible cotton. You unpick the number of strands the fabric needs and leave the rest on the skein. A photo converter’s job is to pick which skein numbers appear, not to invent dye lots.
Typical mapping:
- DMC six-strand cotton (the default on most photo charts)
- Anchor as an alternate range; codes are not interchangeable with DMC without a conversion table
- Colour count of 2–50: each unique chart colour is one skein number (or a blend of two, if you add blends by hand later)
Wool on mono canvas is a different shopping list. If the piece is tent stitch in tapestry wool, use the needlepoint or tapestry guides; those charts can still show DMC numbers as a colour reference, but you will usually match wool by eye.
Floss-specific choices that change the chart
Strand count vs fabric. Two strands on 14-count Aida is the usual photo default (good coverage without a stiff crust). One strand on 18-count keeps the fabric from filling solid; three strands on 11-count covers faster. The converter does not change the grid when you change strands — only coverage and how much floss you burn.
Near-duplicate numbers. Photographs contain thousands of RGB values. Floss ranges have a few hundred. Quantization groups those RGBs, then a Delta E match assigns the closest skein. Skin and sky often land on several neighbouring DMC greys or peaches that look identical in the hoop and miserable to park. That is why colour count and confetti reduction matter more for floss than for a 12-colour wool cushion.
Skeins, not “infinite thread.” A bill of materials estimates length per colour. Dark outlines and hair eat floss; large pale backgrounds do too if you stitch them instead of leaving Aida showing. Buy an extra skein of the two or three colours that dominate the subject.
Blends. Some stitchers mix one strand each of two close numbers to fake an in-between shade. Photo charts typically output solid colours. You can introduce blends on the digital canvas by replacing a band of a third colour with a 1+1 mix, but that is a manual choice, not the default conversion.
How conversion works (three steps)
1. Upload and customise

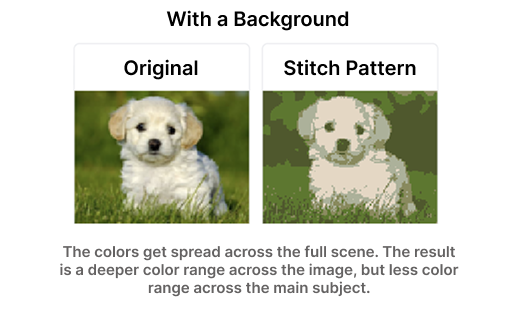
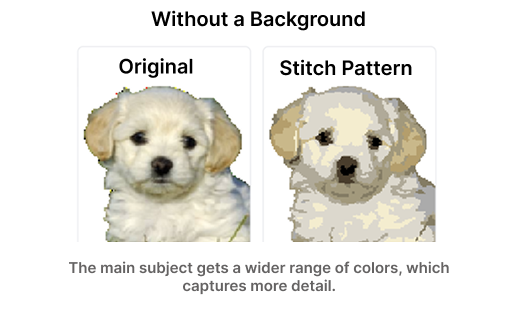
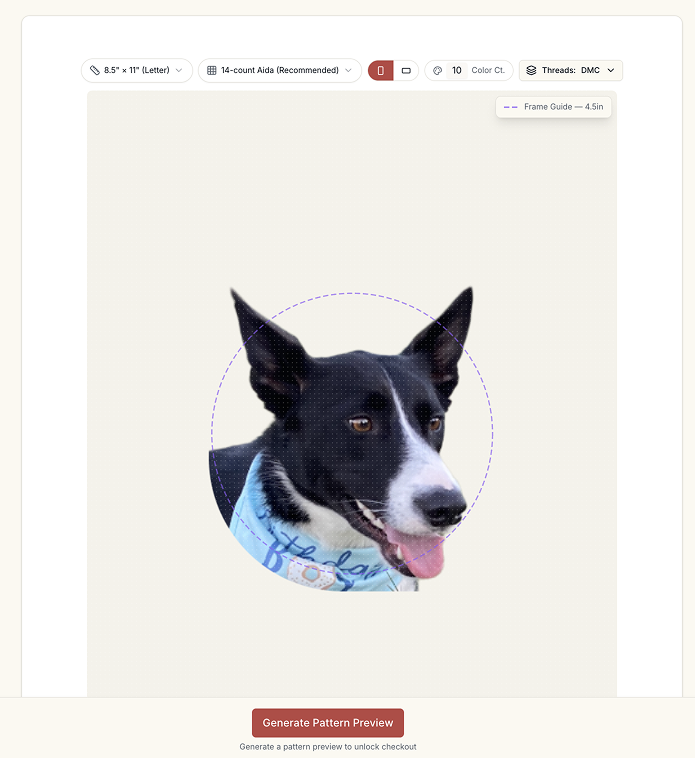
In the pattern editor, upload the photo, crop the subject large, and adjust contrast. Soft, low-contrast snapshots produce a fog of mid-value floss that never quite looks like a face. Set 2–50 colours and the fabric count you will actually stitch.
Typical controls:
- Upload JPG, PNG, or WebP
- Crop and rotate
- Brightness, contrast, saturation
- Colour count (this is how many floss numbers you will buy)
- Canvas type and count
A transparent-background PNG keeps skeins on the subject. Background stitches are extra colours and extra metres of pale floss.
2. Generate a pattern preview
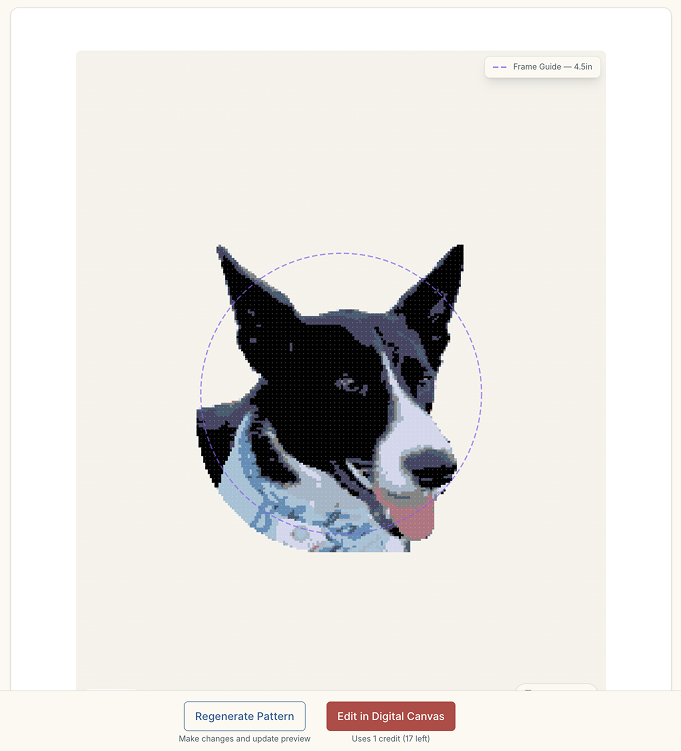
Colour quantization reduces the picture to your palette. Thread mapping assigns DMC or Anchor. Confetti reduction merges isolated single stitches so you are not cutting a 12-inch length of DMC 762 for one cross.
Read the preview as a shopping test:
- Could you stitch this with the labelled numbers, or are there five almost-identical beiges?
- Would 15 colours (bold, fewer skeins) or 25 (portrait) fit better than 45?
- Do the darkest and lightest floss still exist? Photos need those anchors or the piece goes muddy.
3. Work on the digital canvas
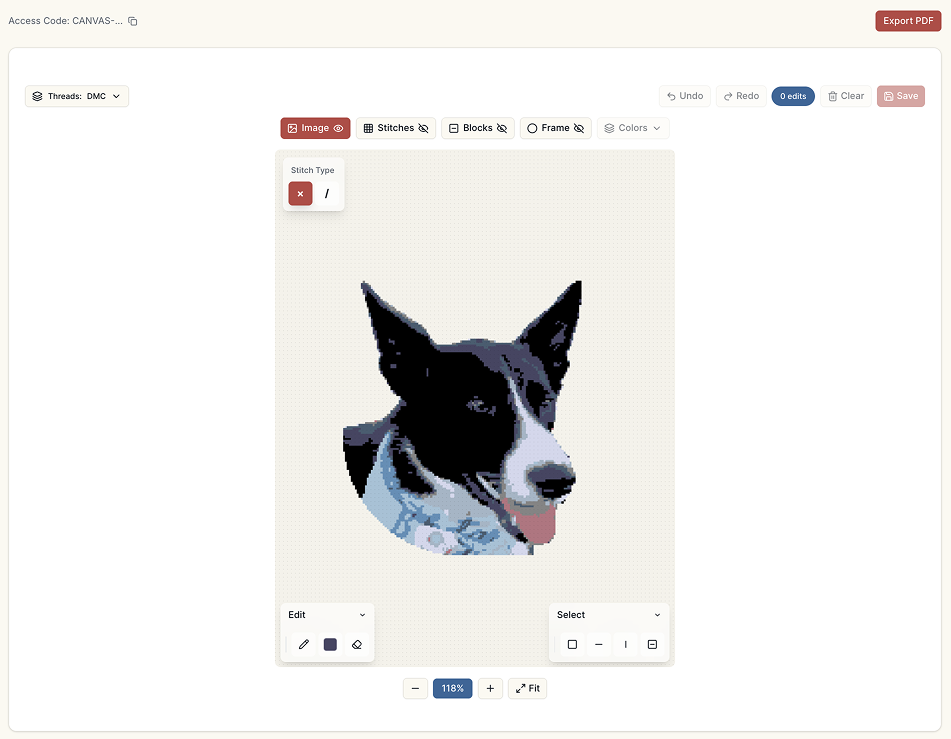
Swap a number everywhere it appears if your stash already has a close substitute. Delete singleton stitches of a colour you refuse to buy. Check the bill of materials for metres or skein estimates, then export a chart and colour key.
Useful floss edits:
- Merge two neighbouring DMC codes into the one you already own
- Keep a catchlight as a single pale number rather than three off-whites
- Confirm strand count on the printout so you do not stitch the whole piece in six strands by habit
Practical floss notes for photo pieces
- Park and stitch (or parking) is easier when confetti is already reduced; leftover specks still force constant colour changes.
- Daylight or a true-colour lamp when comparing skeins to the key; phone screens lie about DMC 739 vs 712.
- Variegated floss is a poor match for photo conversion: the chart assumes a flat colour per square.
- Metallic and satin can substitute for a highlight colour, but coverage and tension differ; treat them as accents, not as the quantized palette.
Quick facts
- Palette is stranded cotton (DMC or Anchor), one code per chart colour
- 2–50 colours; portraits usually sit around 20–30 skein numbers
- Strand count is a coverage choice (often 2 on 14-count); it does not resize the grid
- Bill of materials estimates how much of each number to buy
For the stitch grid itself, continue with photo to cross stitch. For covered canvas instead of floss on Aida, see canvaswork.
Try it with your own photo
Upload a photo and see your counted cross stitch pattern preview — free, before you pay anything.
Try the free pattern preview